

Data Center
How to Export and Reuse Custom Areas
Custom Areas allow you to define your own geographic boundaries and use them across your campaign—whether you’re building voter groups or creating canvassing routes.
Creating Custom Areas
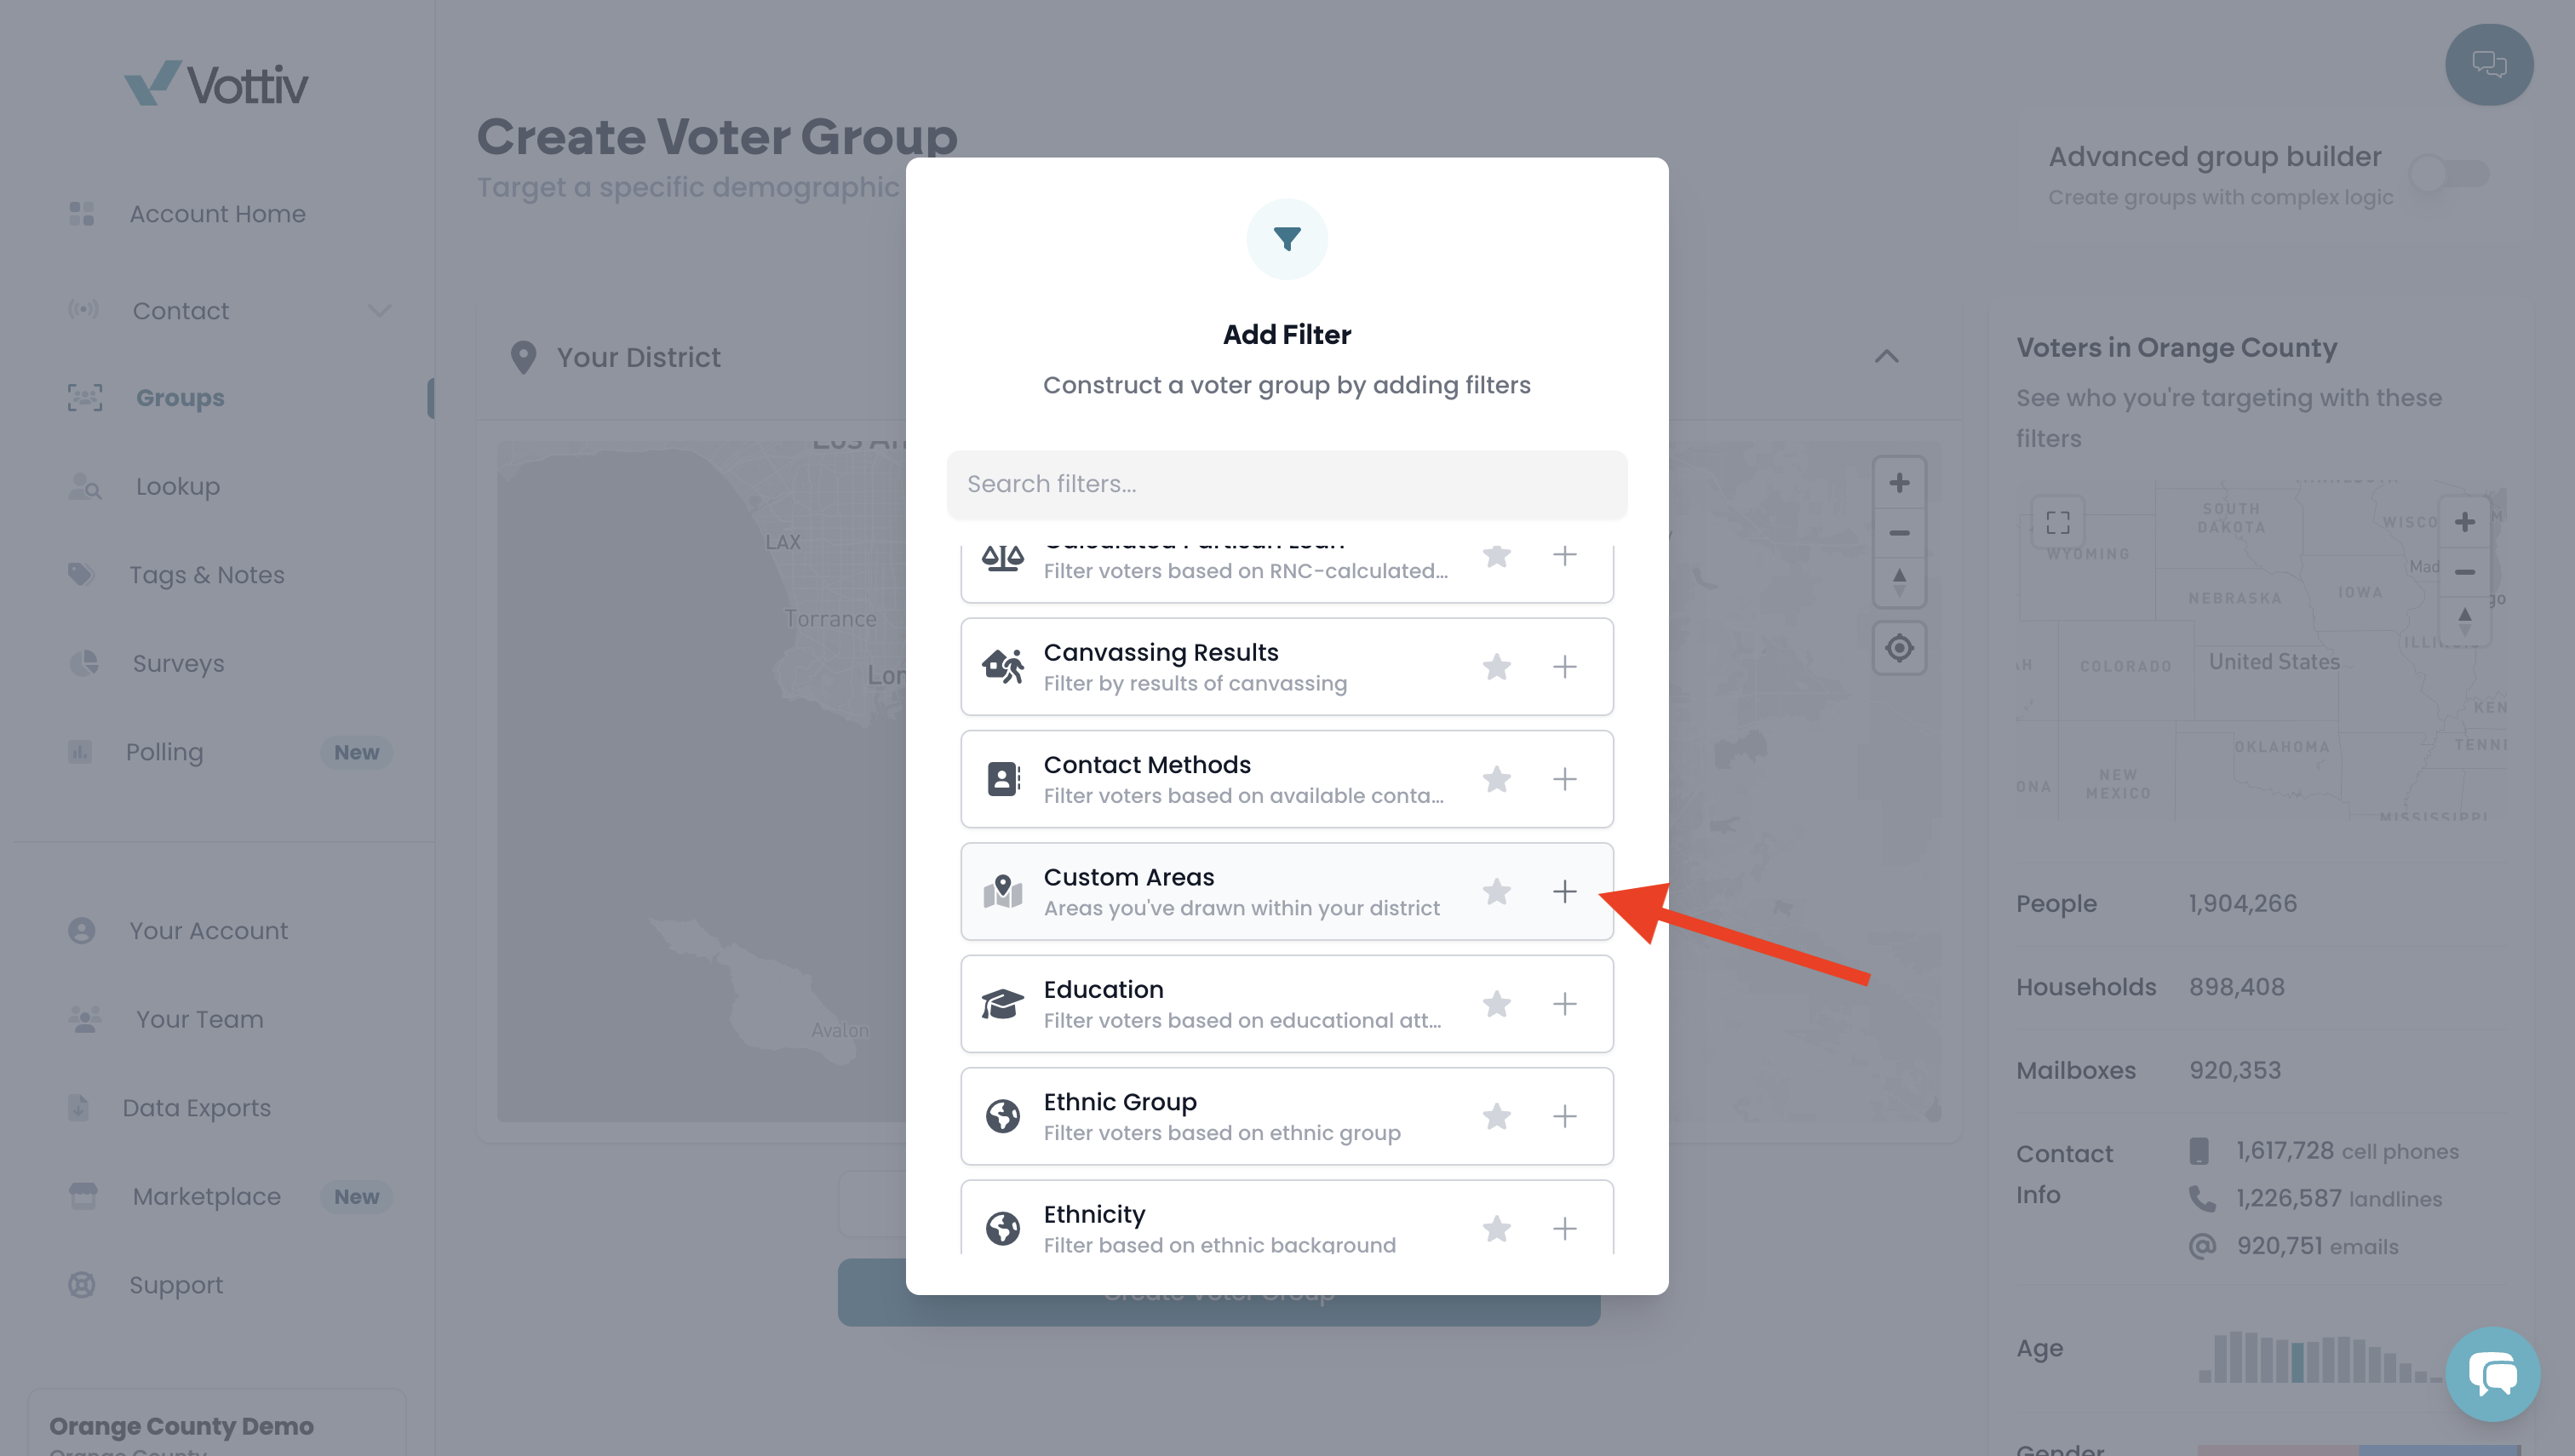
Custom Areas are created when building a voter group:
Go to create a Voter Group
Use the Custom Area filter
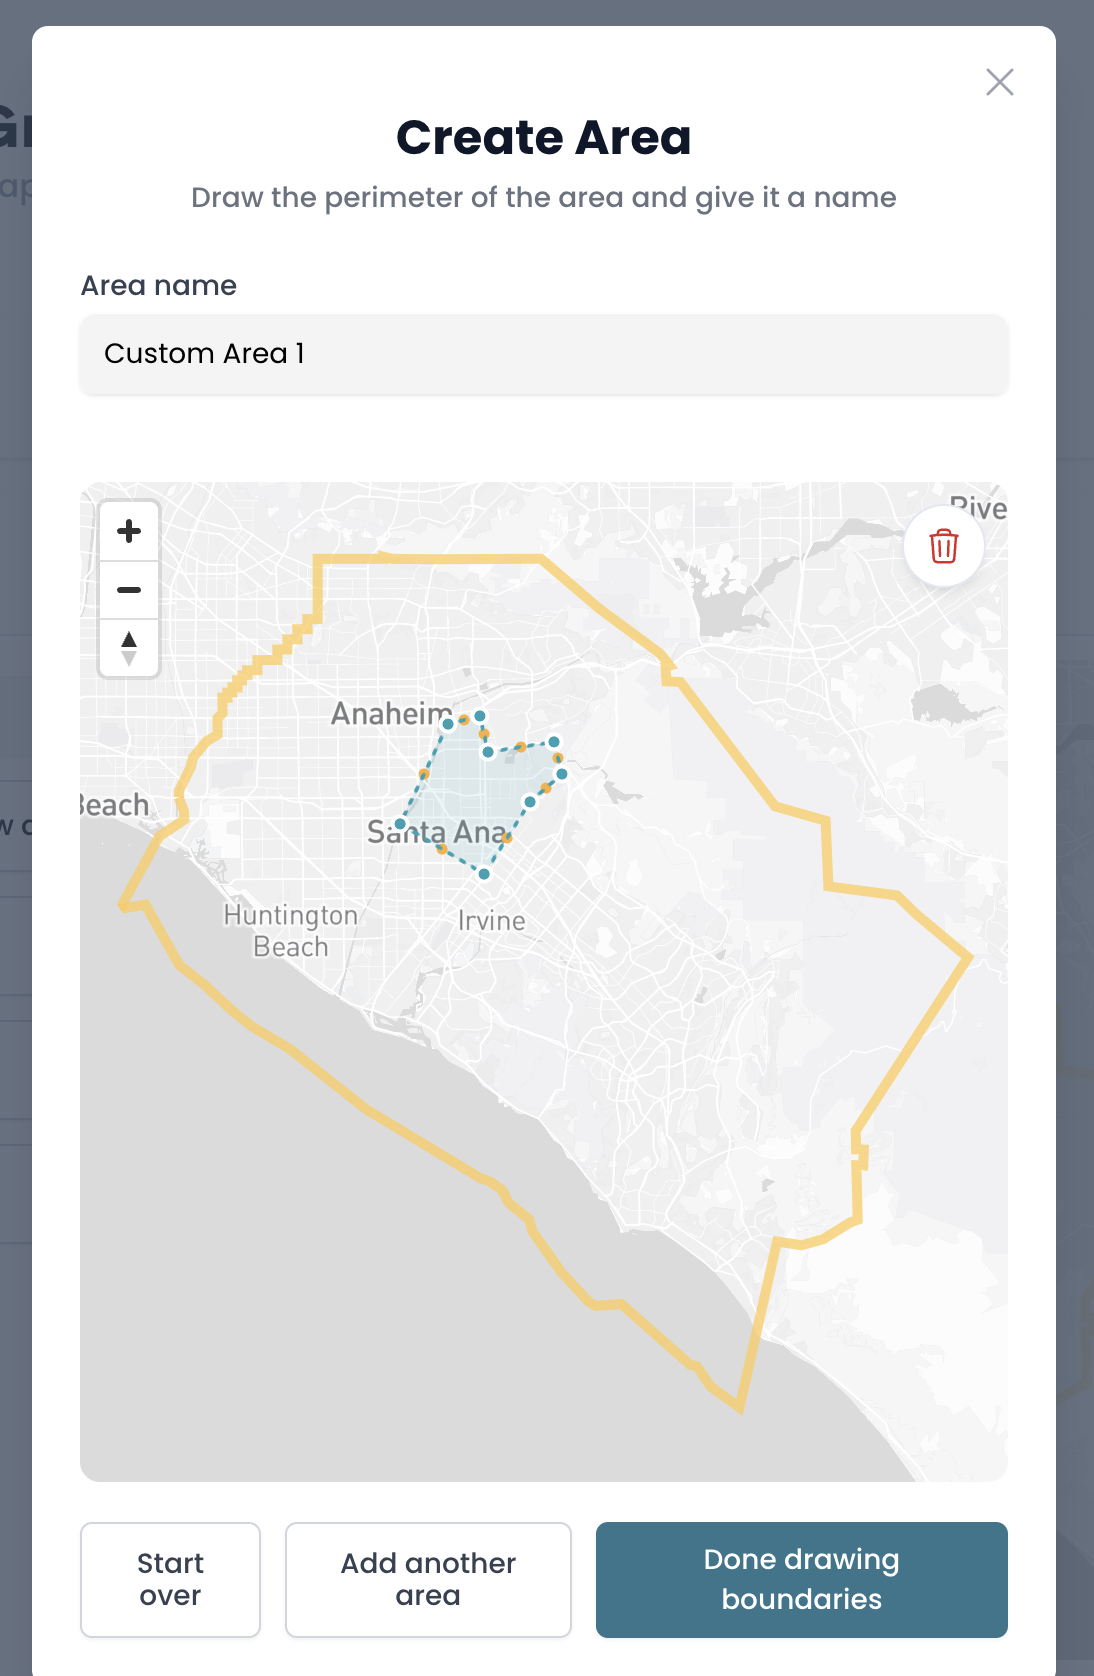
Draw and define your area on the map
Save the voter group
Once created, that Custom Area is saved to your account and can be reused in other parts of the platform.
Managing Custom Areas (Create, Import, Export)
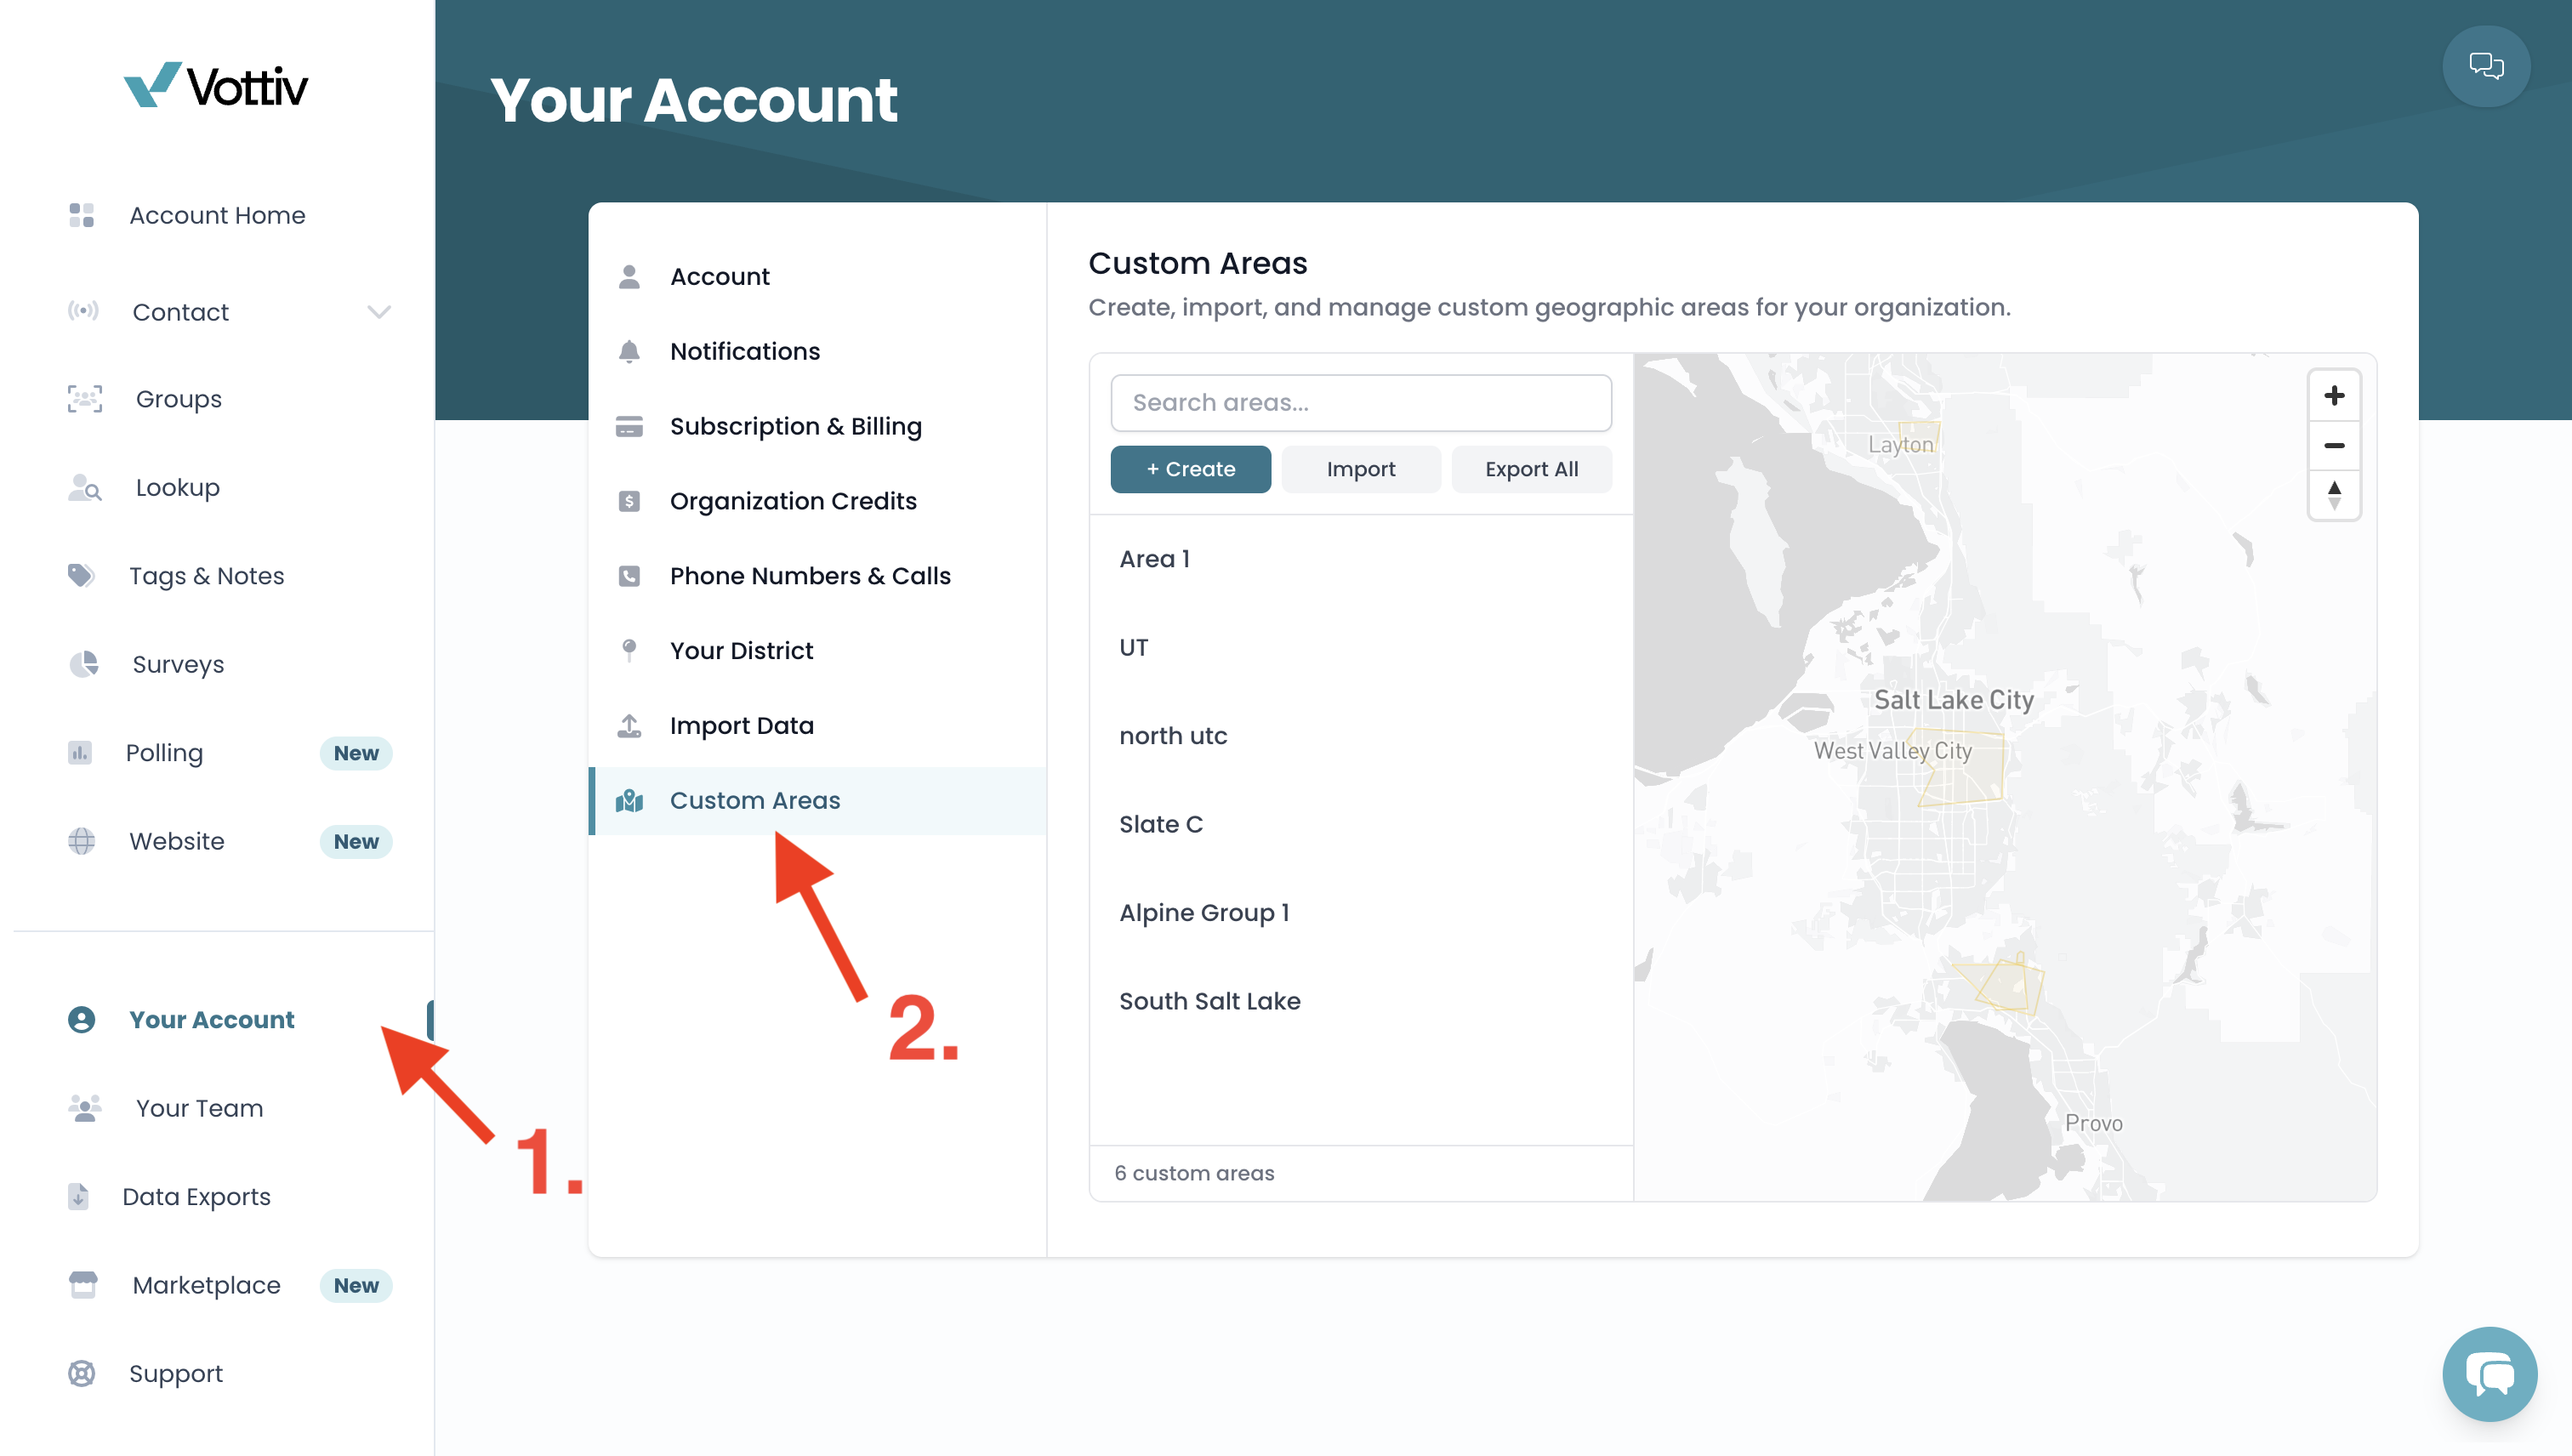
To manage your Custom Areas:
Go to Your Account
Select Custom Areas
From here, you’ll see three options:
Create → Draw a new Custom Area on the map and give it a name
Import → Upload an existing area file from your computer (a file picker will open)
Export All → Download all saved Custom Areas
Using Custom Areas in a Canvass
You can use Custom Areas when creating or editing a canvass:
When creating a canvass
Create a new canvass
Select Manual Routes
Choose your saved Custom Areas
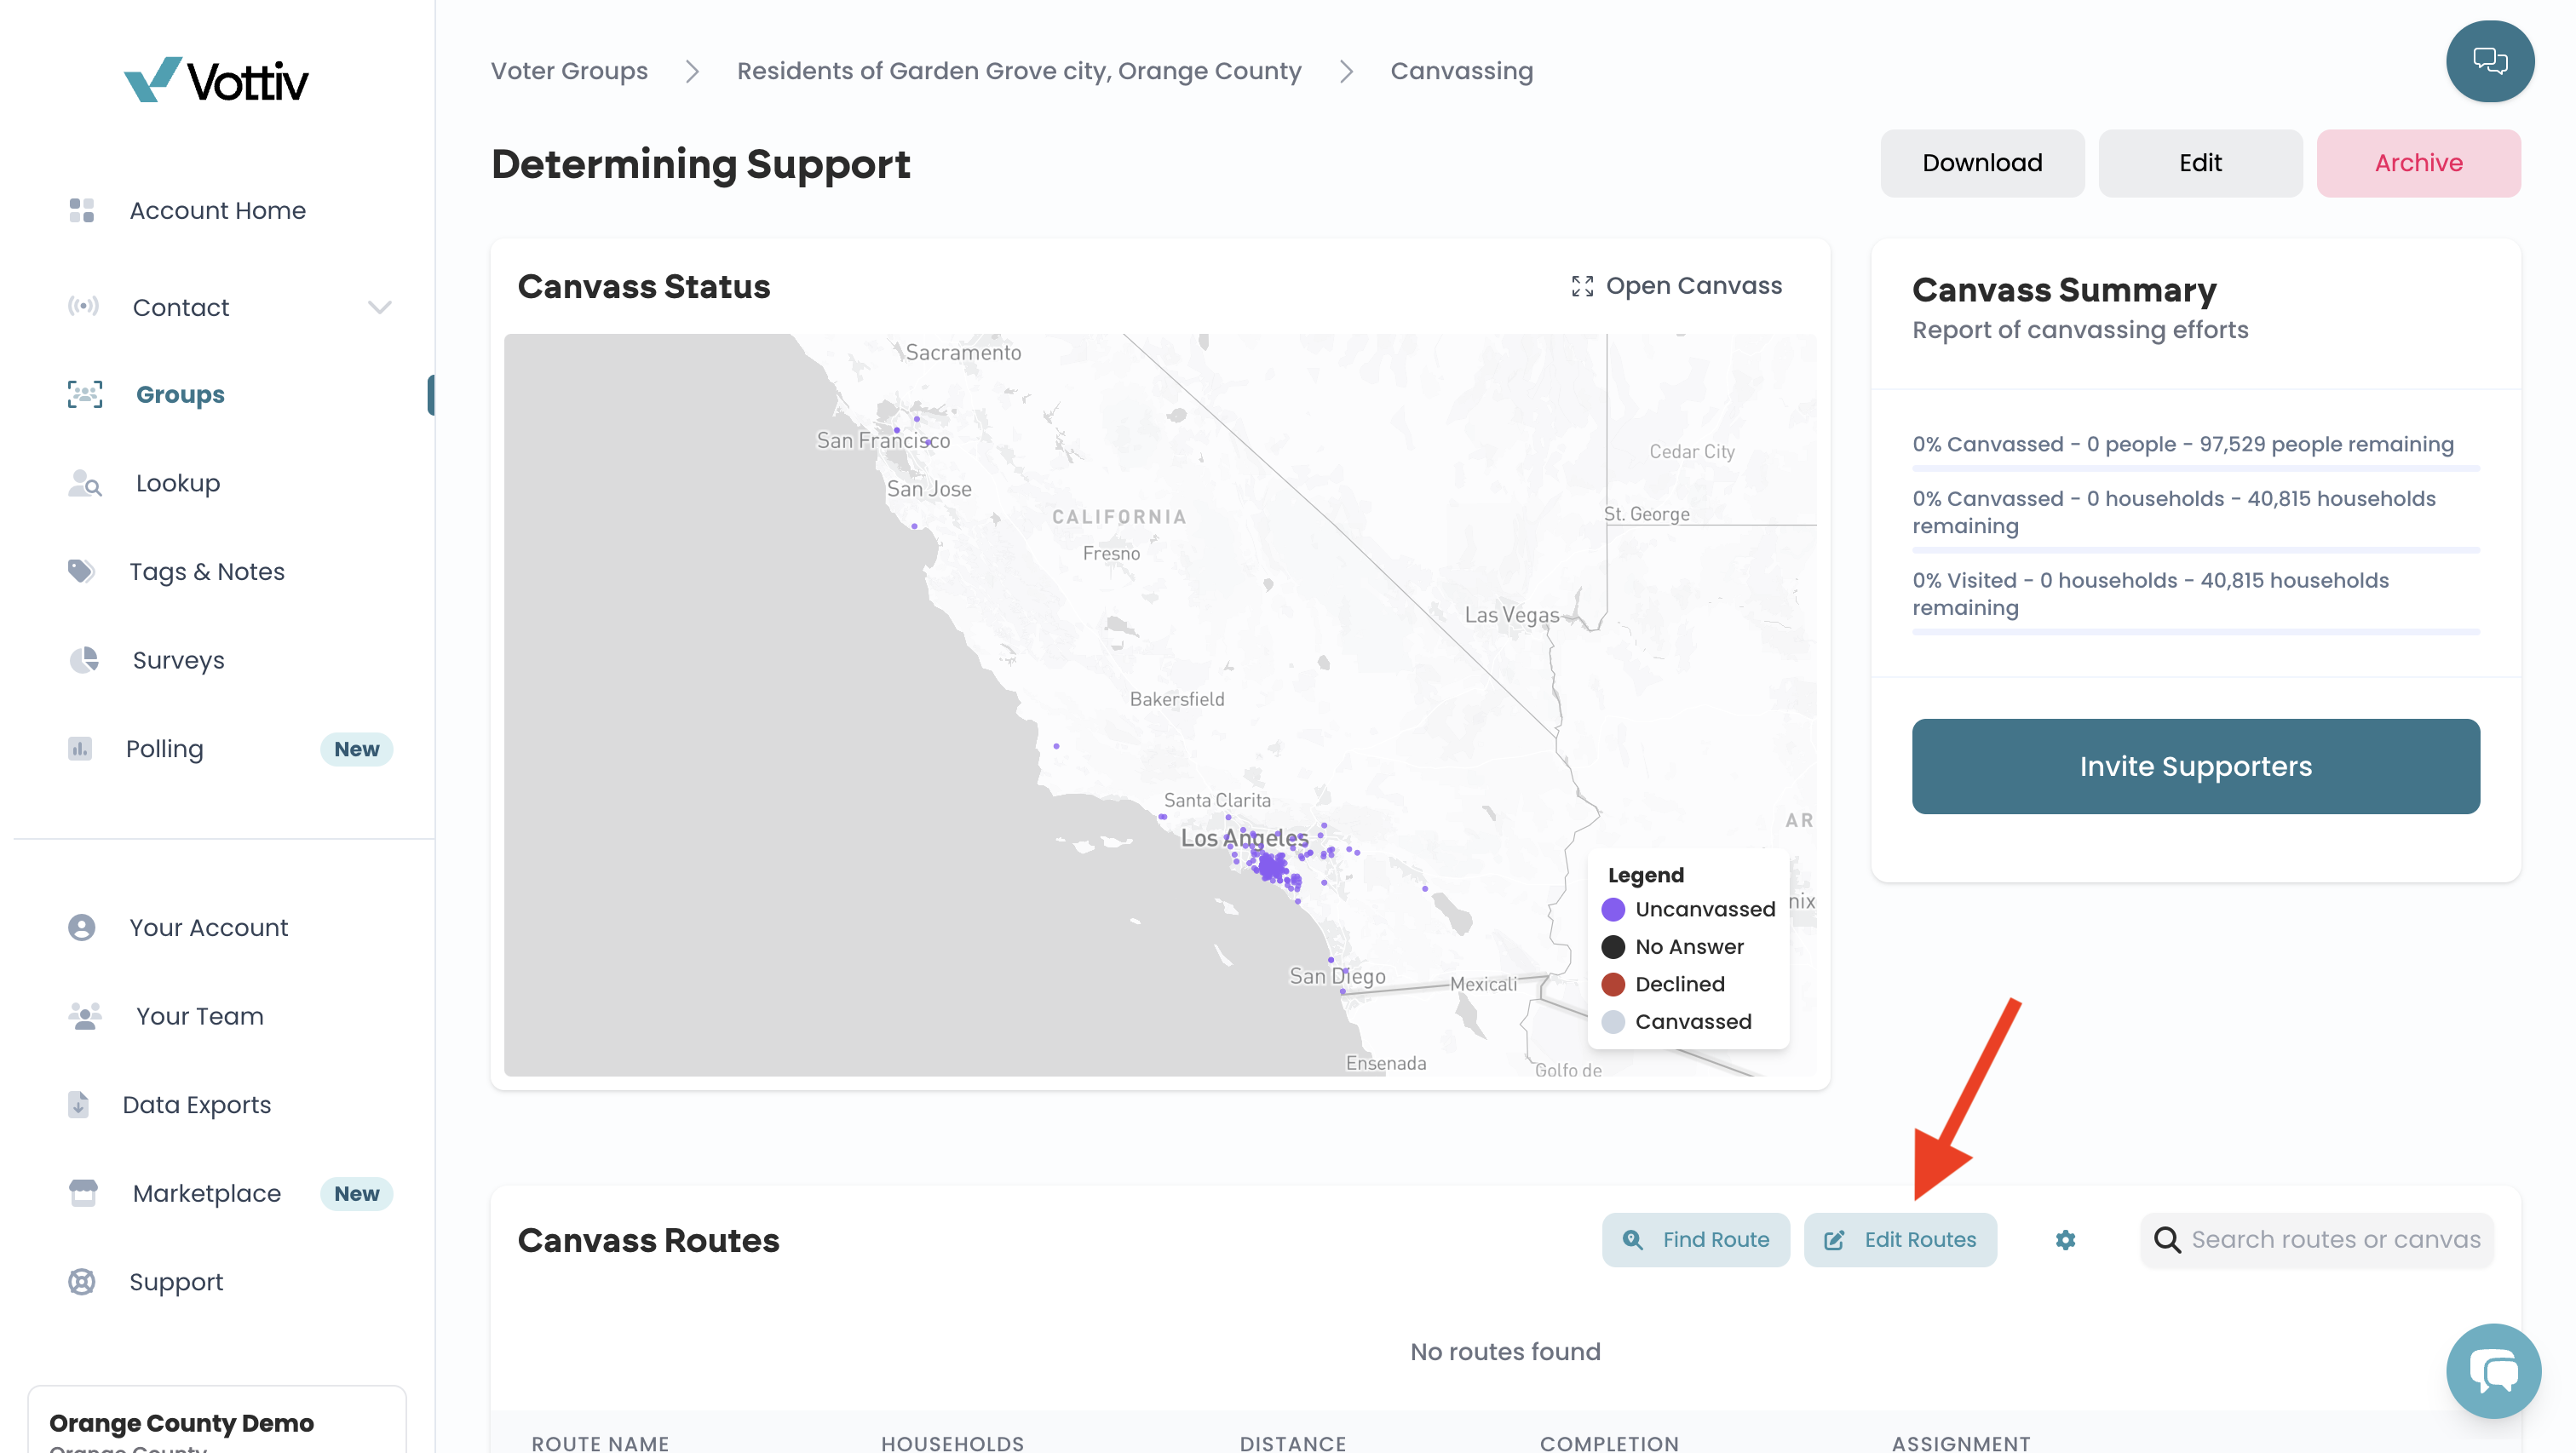
After a canvass has been created
Open the canvass
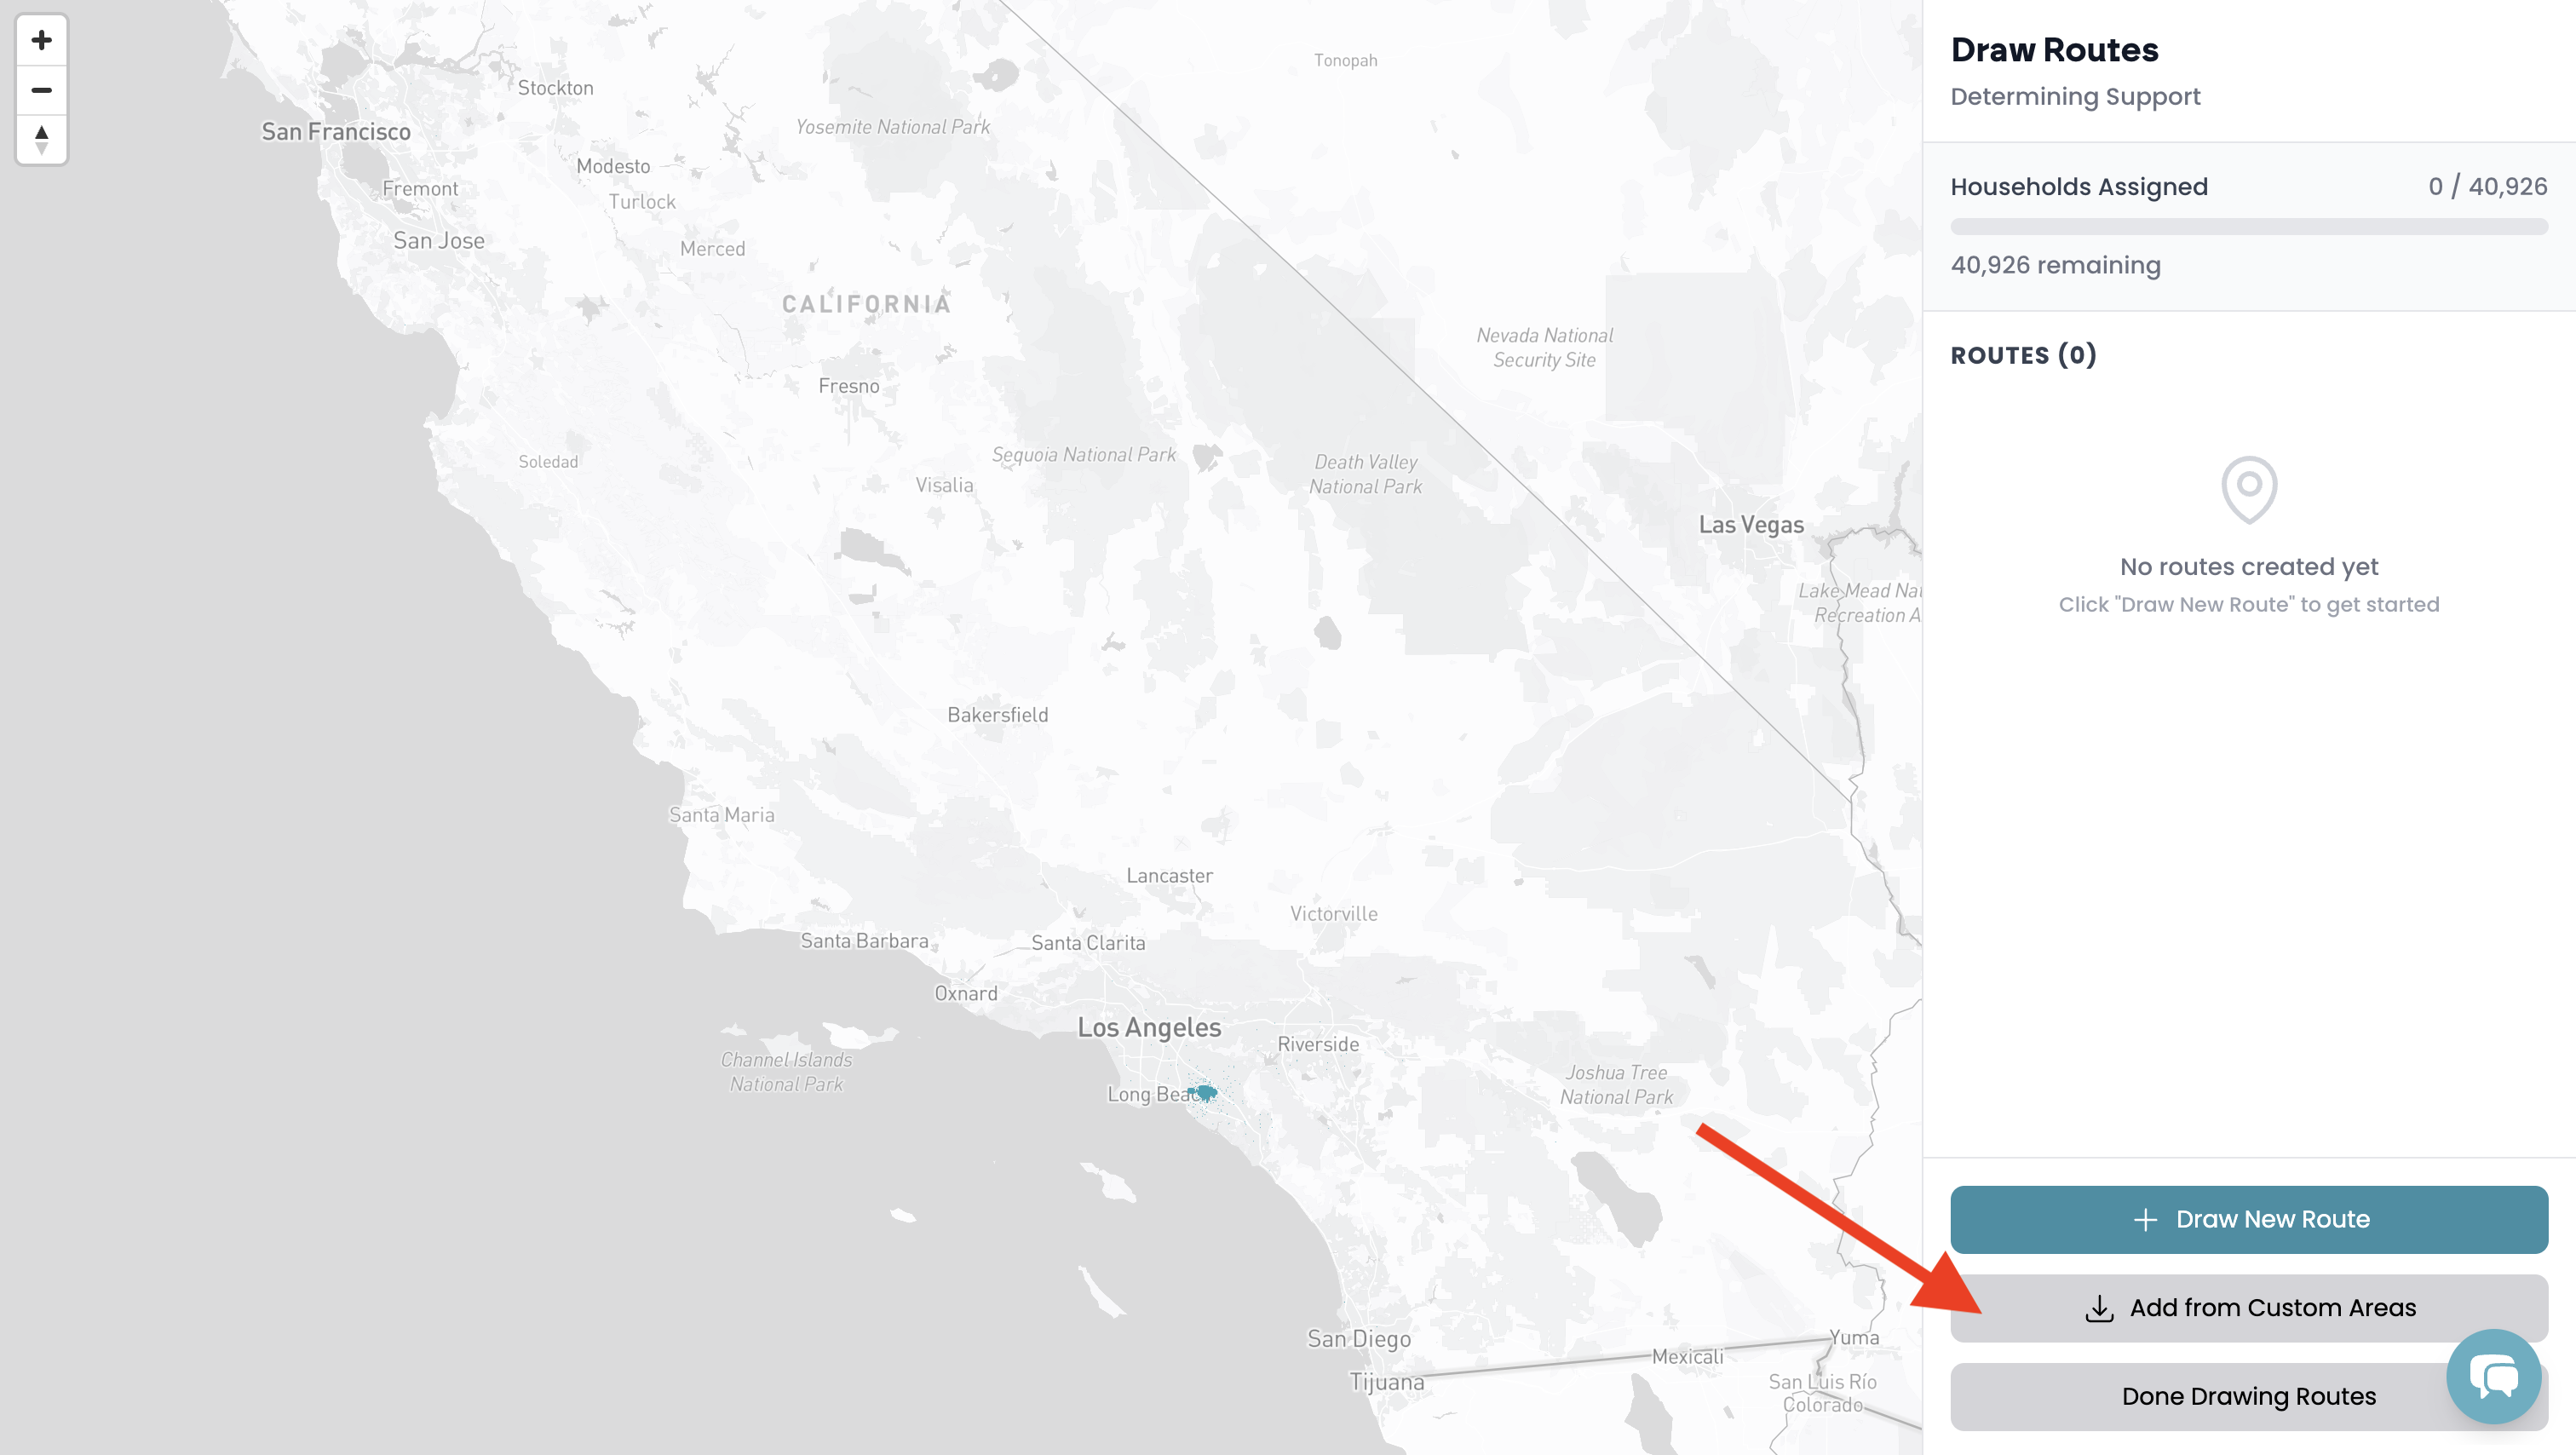
Click Edit Routes
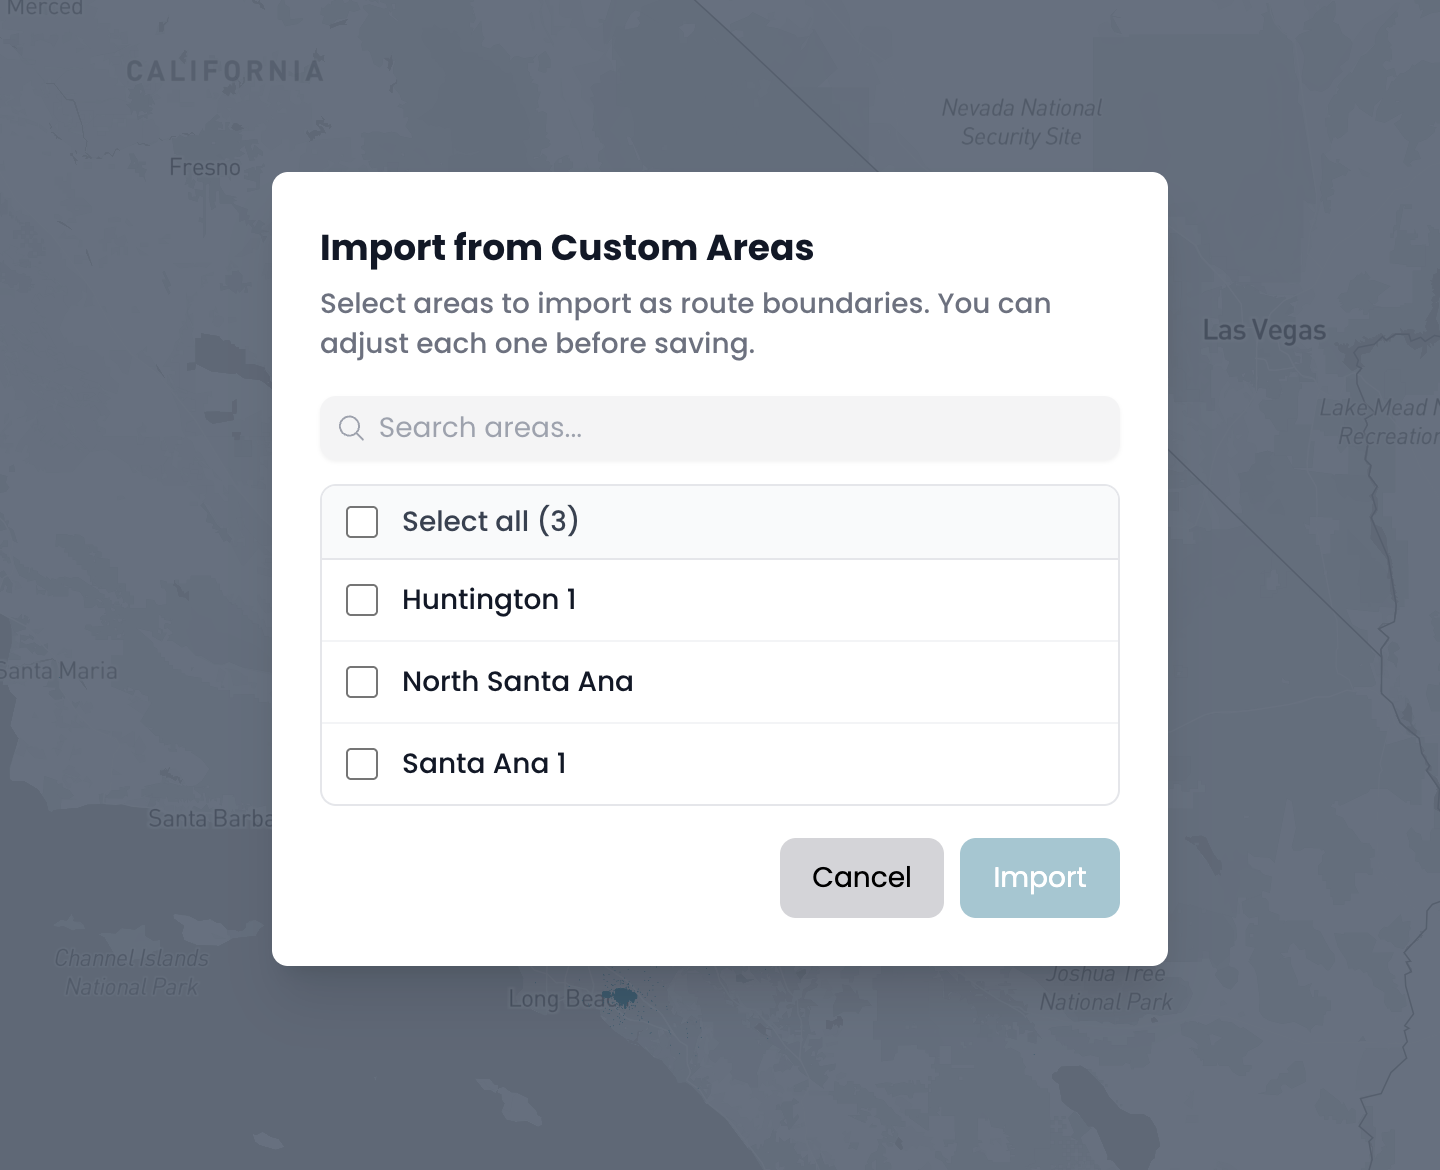
Select the Custom Areas option
Apply your saved areas
This allows you to divide your canvass using boundaries you’ve already defined.
Editing Custom Areas
You can update Custom Areas at any time:
Go to Your Account → Custom Areas
Select the area you’d like to edit
Adjust the boundaries
Save your changes
Important Notes
Custom Areas are saved, reusable, and exportable
Routes created or edited directly within a canvass are temporary and not saved as Custom Areas
To reuse or export routes, they must be created as Custom Areas
Best Practice
If you plan to reuse geographic boundaries across voter groups or canvasses, create them as Custom Areas first so they can be easily applied and managed later.
Was this article helpful?